How to Set Custom Screen Saver on Windows 10/11
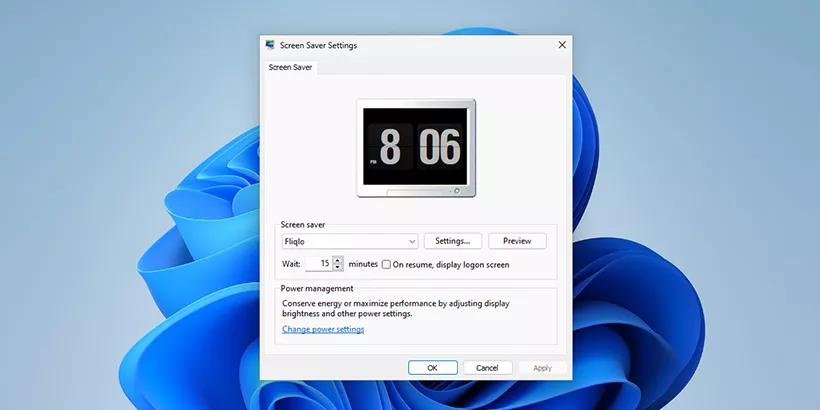
There is no screen saver I like in the drop-down list of Windows Screen Saver. So, I want to add a new screen saver or is there a way to customize the current screen saver? If you have this question, this article will walk you through the process of setting custom screen saver on Windows 10/11. Let's get started.
Windows Screen Saver is a program that runs when your computer is on inactivity state for certain intervals. The initial purpose is to protect your screen from "burn-in", which causes the certain area of your screen always has some image even if the screen turned off. With advancements in display technology, the need for screen savers to prevent screen burn-in has diminished. Therefore, screen savers are now primarily used for entertainment purposes.
Next, I will explain how to customize it to meet your needs.
Way 1: Customize the Current Screen Saver
In this way, you can modify the settings of default screen saver to meet your needs.
Step 1: Open the Screen Saver Settings window. The specific location is Settings > Personalization > Lock screen > Screen saver settings on Windows 10 or Screen saver on Windows 11.
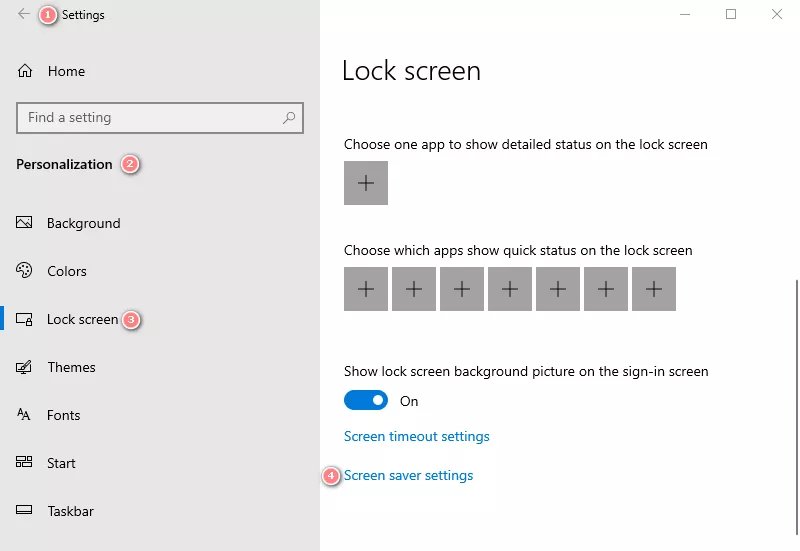
Tips: Scroll down to find the corresponding option.
Step 2: In the drop-down list on "Screen saver" section, select a screen saver from the drop-down list to use.
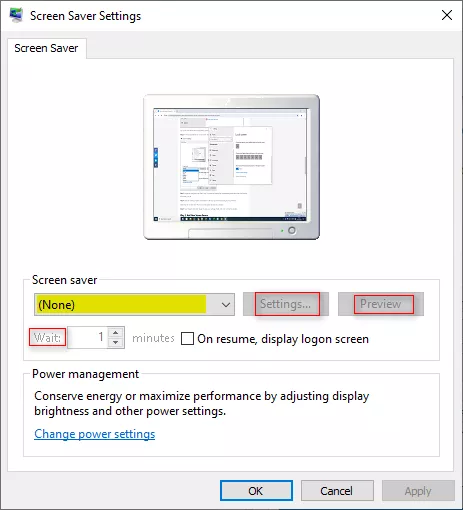
Step 3: Adjust the wait time in the "Wait" area. The screen will display the corresponding screen saver after the duration of inactivity you set.
Step 4: Click the "Settings" button and modify it in the pop up window according to your preference.
Note: Only the "3D Text" and "Photos" provide options for users to customize.
Step 5: Save changes, then click "Apply" to apply your settings. Finally, click "OK" to close the window.
Way 2: Add New Screen Savers
By following these steps, you will know how to add screen savers to the drop-down list of Windows Screen Saver window and get more abundant screen savers online.
Step 1: Download a *.scr file from this website.
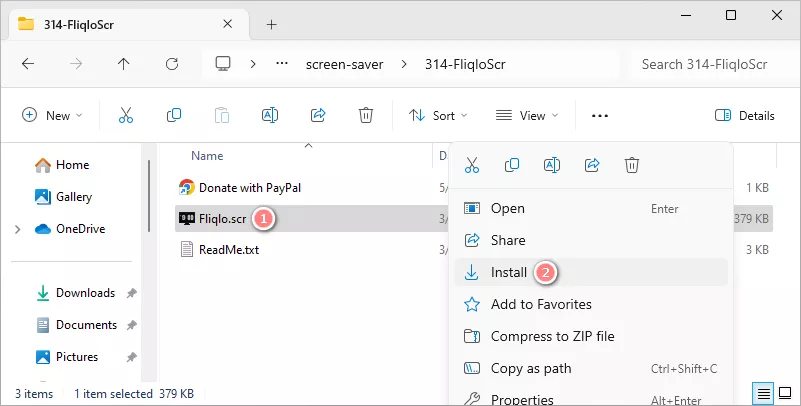
Step 2: If the downloaded file is a zip file, unzip it. Right click the *.scr file, then select "Install" option from the context menu appears.
Step 3: The Screen Saver Settings window will pop up, and the screen saver you install will be selected.
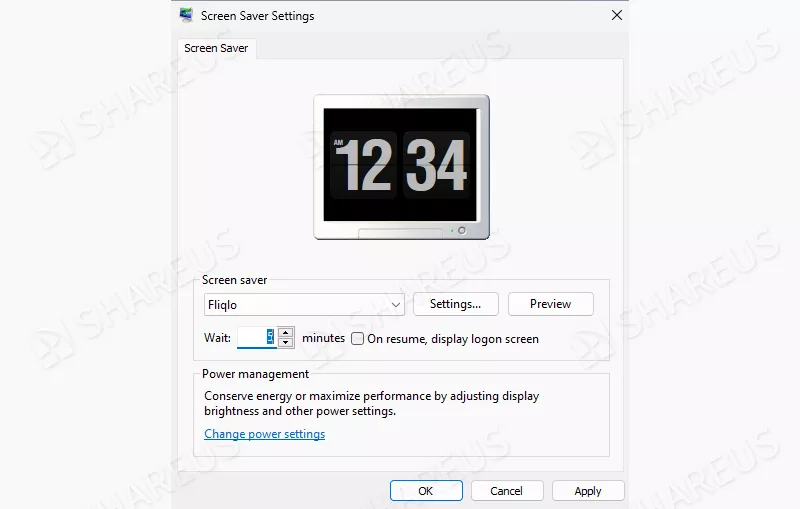
Step 4: You can configure the settings of it and preview the effect through "Preview" option.
Step 5: Click "Apply", then "OK" buttons in the window to complete the configuration.
Notes: If you want to remove the screen saver, delete the corresponding *.scr file. Alternatively, you can remove it like uninstalling any other apps on your computer.
Conclusion
Windows Screen Saver is a good feature to personalize your computer and you can add new screen savers to it through above method. Give it a try and have a better desktop experience.
Watch the Video Tutorial
Personalize Your Windows with a Custom Screensaver – Watch Now!


