How to Share Folder Without Password on Windows 10 & 11

August 23, 2024
Sharing folders with others on your network often requires you to provide your username and password for access. While this method ensures security, it can become cumbersome, especially when sharing with multiple people. Group messages can miss someone, and a system reset might erase stored credentials, requiring you to provide them again. Fortunately, there's a more straightforward way to share folder without password on windows 10 and 11. Let's walk through the steps to make this process easier and more efficient.
1. Prerequisites
Before diving into the folder-sharing process, ensure the following conditions are met to facilitate smooth and secure access:
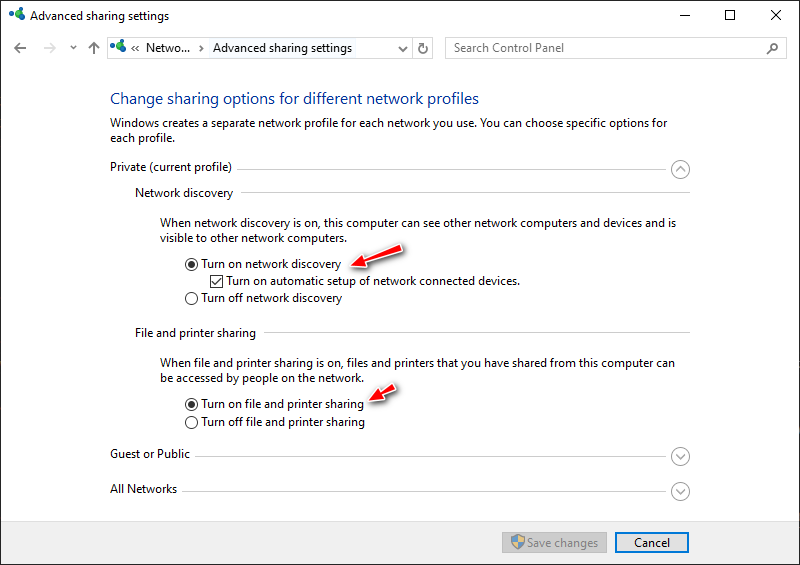
Enable "Network Discovery" and "File and Printer Sharing"
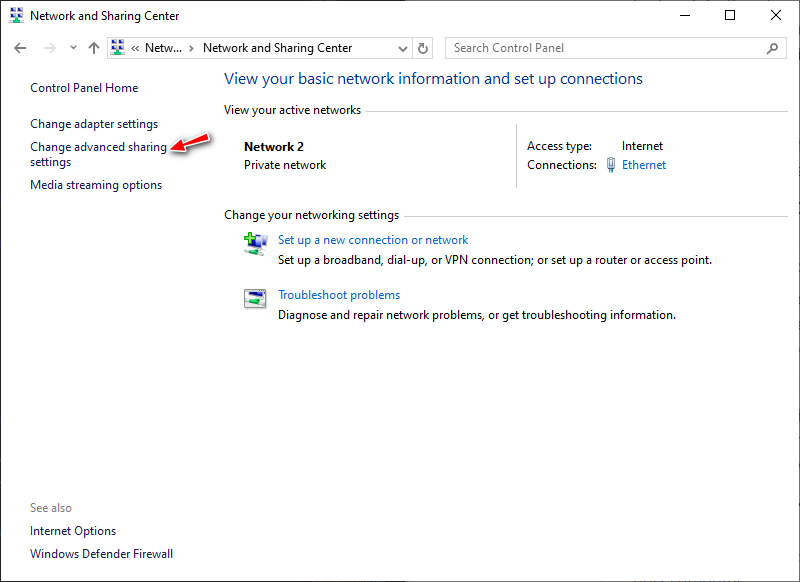
To enable it, go to Control Panel > Network and Internet > Network and Sharing Center > Change advanced sharing settings. Check the "Turn on network discovery" and the "Turn on file and printer sharing" option.
Ensure All Devices Are on the Same Local Network:
Both your device (the sharing end) and the devices accessing the shared folder need to be connected to the same local area network (LAN). This is essential for network discovery and seamless folder sharing.
(Optional) Change Network Profile to Private
You can find detailed steps in this article: How to Change Network Profile Type in Windows 10/11.
2. Configuration on the Sharing End
Now that the prerequisites are in place, let's move on to setting up the folder sharing on the host computer.
Share the Folder:
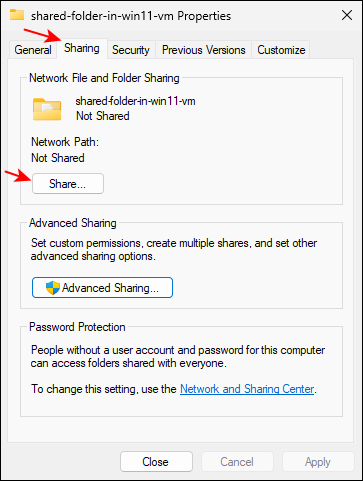
Step 1: Navigate to the folder you want to share. Right-click on it and select "Properties".
Step 2: Switch to the "Sharing" tab. Then, click "Share" option.
Step 3: Add "Everyone", then assign it read permissions in the prompted window.
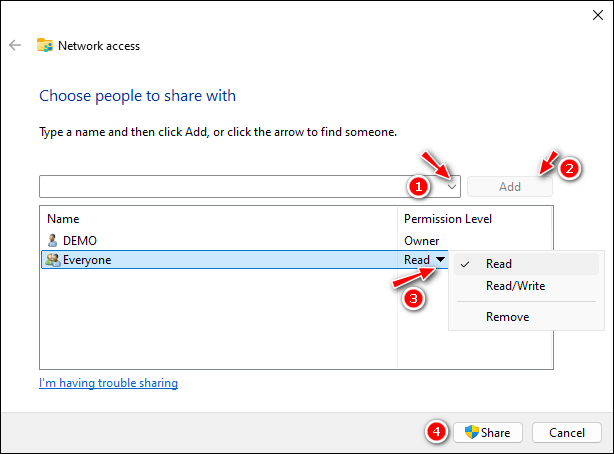
Step 4: Click "Share" button to complete sharing.
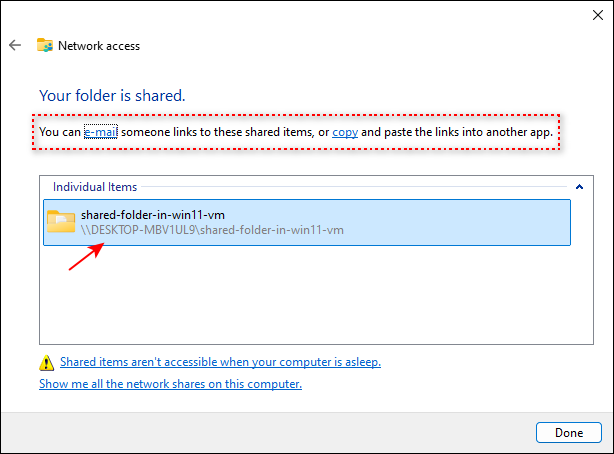
Step 5: Click "Done" to close this window. The sharing steps are complete.
Turn Off Password Protection:
To allow access without requiring a username or password, you'll need to disable password-protected sharing.
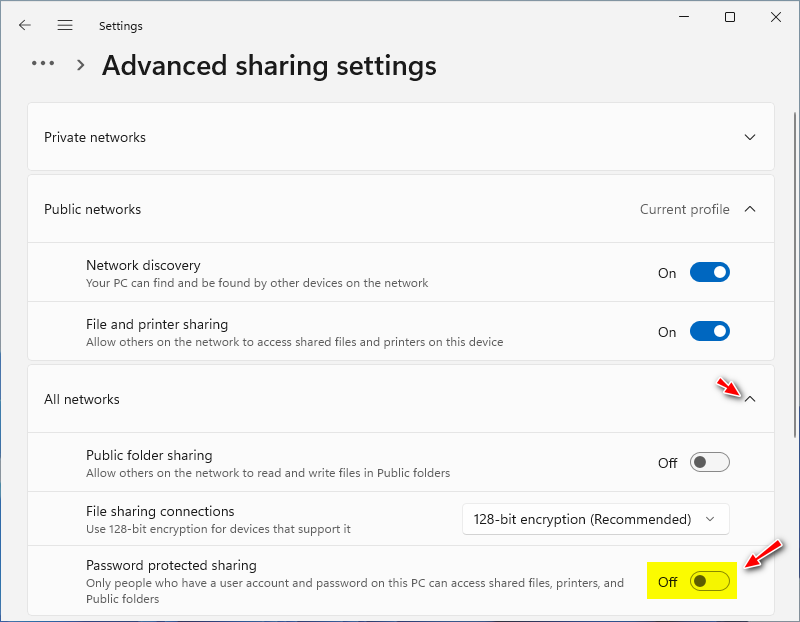
Turn off password protection on Windows 10
Step 1: Go to Control Panel > Network and Internet > Network and Sharing Center > Change advanced sharing settings.
Step 2: Scroll down to "All Networks" and under "Password protected sharing", select "Turn off password protected sharing".
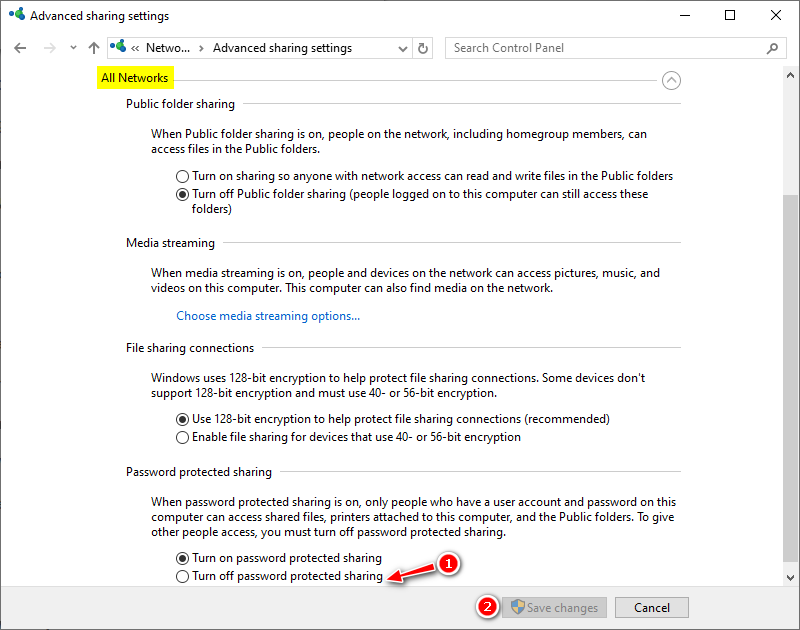
Step 3: Click "Save changes" to apply.
Note: If the current login user is not an administrator, you need to type the password of admin user to continue.
Turn off password protection on Windows 11
The first step is the same as in Windows 10.
Next, scroll down to "All networks", then toggle off the "Password protected sharing" button.
Additional Tips:
Beyond the basic setup, here are a few more tips to manage shared folders efficiently:
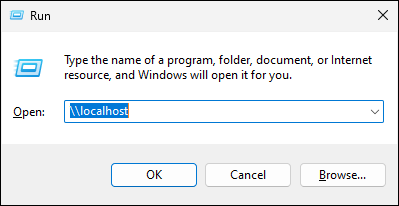
View All Shared Folders on Your Computer:
To see a list of all folders you've shared, press Win + R to open the "Run" dialog, then type \\127.0.0.1 or \\localhost and press Enter. This command shows a list of all active shared folders on your computer.
Stop Sharing a Specific Folder:
If you decide to stop sharing a folder, you can do so by going to the folder's "Properties" > "Sharing" > "Advanced Sharing" and unchecking "Share this folder".
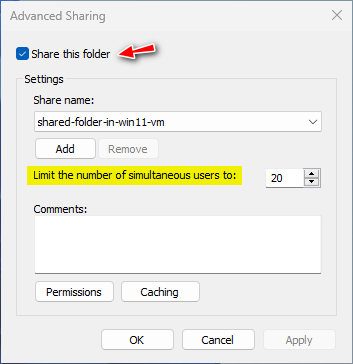
Additionally, in the "Advanced Sharing" settings, you can set the limit on how many people can simultaneously access the folder, giving you greater control over shared resources.
3. Configuration on the Accessing End
Once the folder is shared on the host computer, the other devices can access it easily. Here's how:
Step 1: Press Win + R to open the "Run" dialog.
Step 2: Type \\computer-name or \\host_ip and press Enter. Replace "computer-name" with the name of the host computer or "host_ip" with its IP address.
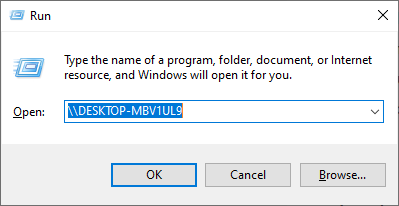
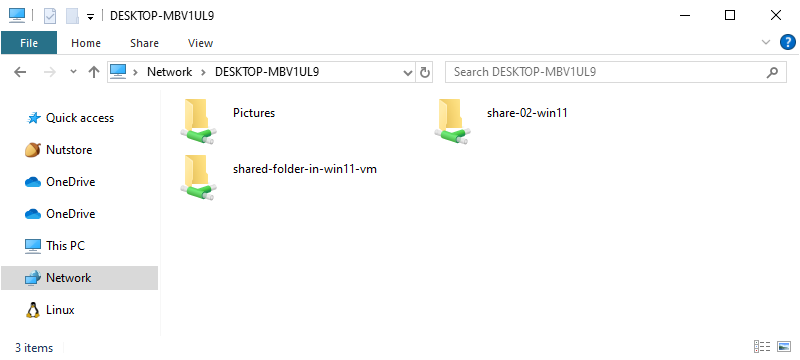
Step 3: Once connected, you can browse through the folders that the host has shared.
Note: Here "host" means sharing end computer.
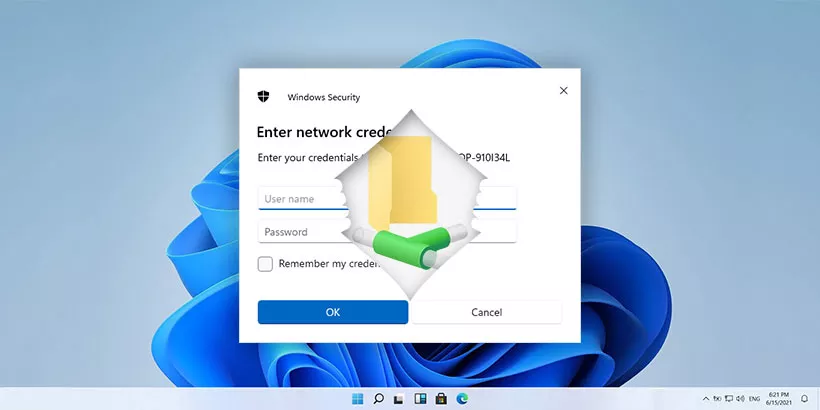
Tip: If a credential window appears, you can enter any placeholder username and password, like "123" and "123", to proceed.
For convenience, you can create a shortcut to this shared location on the client device's desktop for quicker access in the future.
4. Conclusion
Sharing folders on Windows 10 and 11 without requiring a password is straightforward once you've configured your system correctly. By following the steps outlined in this guide, you can easily share files and folders with multiple users without the hassle of distributing credentials. This method saves time and simplifies access, making it ideal for home networks or small workgroups where ease of use is a priority.