Solved: Windows Driver Foundation Missing Error
Windows Driver Foundation(WDF), once known as the Windows Driver Framework, is a set of tools to help create high quality drivers for Windows systems. When you have outdated drivers, missing system files or you mistakenly disable the certain Windows service, then you are likely to encounter the Windows driver foundation missing error, which is presented with an error message "Driver WUDFRd Failed to Load/Missing". This error means that a related driver has failed to load, causing certain programs to fail, slowing down the computer and etc. Many users have reported that they encountered this error after upgrading Windows to a newer version. If you are also frustrated with this error, here’s how to fix Windows Driver Foundation Missing Error. Before trying the given below methods, check if a simple reboot could work.
1. Update Windows to the latest version
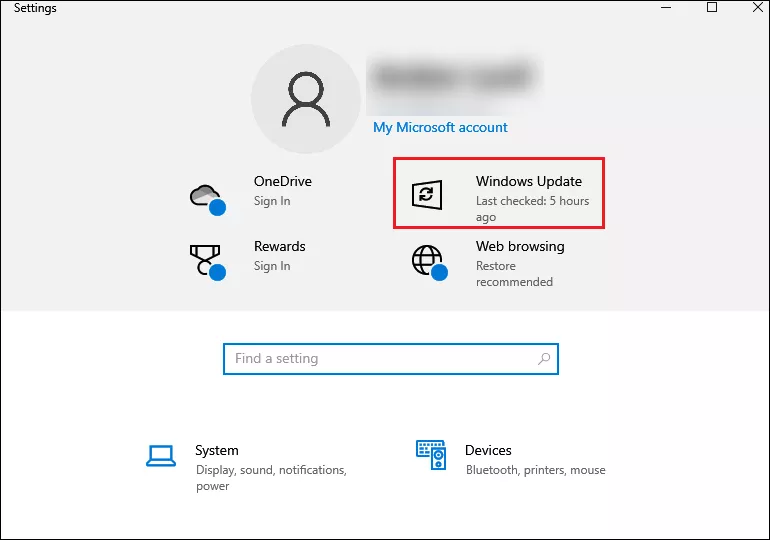
Step 1: Press Windows+I to open Settings and select Windows Update.
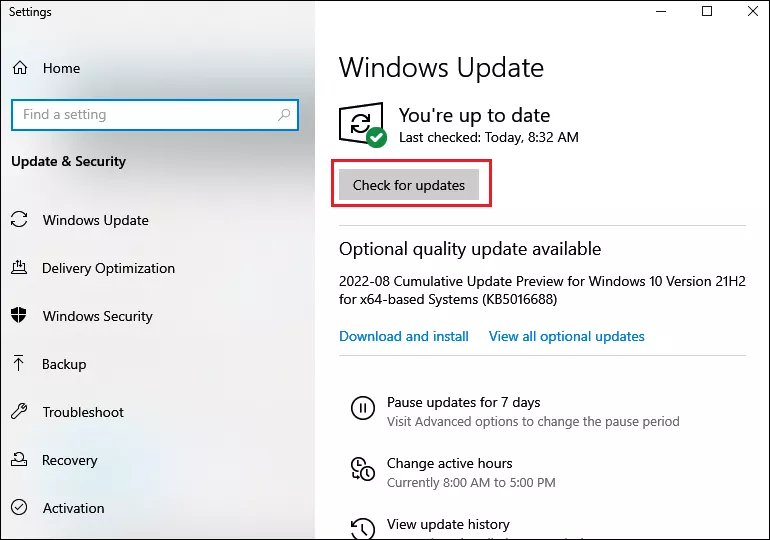
Step 2: Click Check for updates and if there is a recent version on installation, it will prompt you to install, then follow the on-screen instructions.
2. Run SFC scan
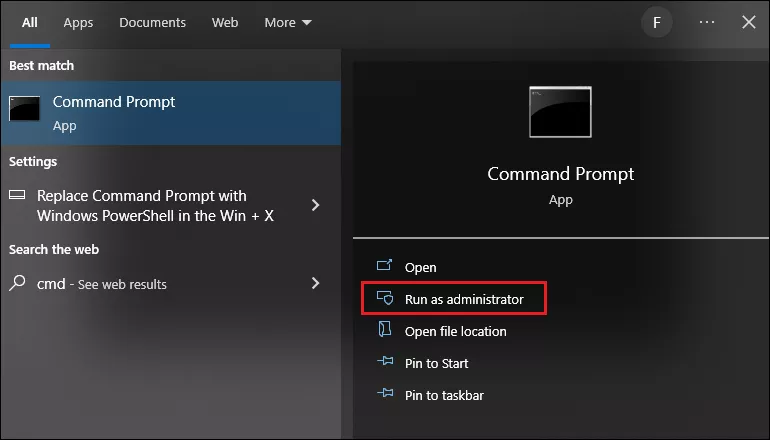
Step 1: Type cmd in the search bar and select Run as administrator.
Step 2: Type sfc /scannow in the command prompt, hit Enter and wait till Verification 100% complete.
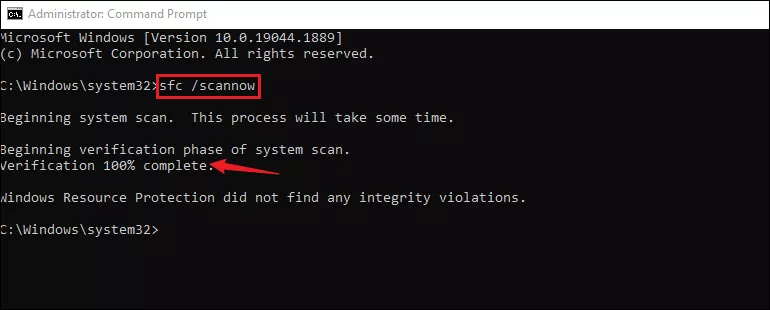
This will run a system file check to repair corrupt windows files in your PC and you can reboot your PC to check whether the error would appear again.
3. Disable hard drive hibernation
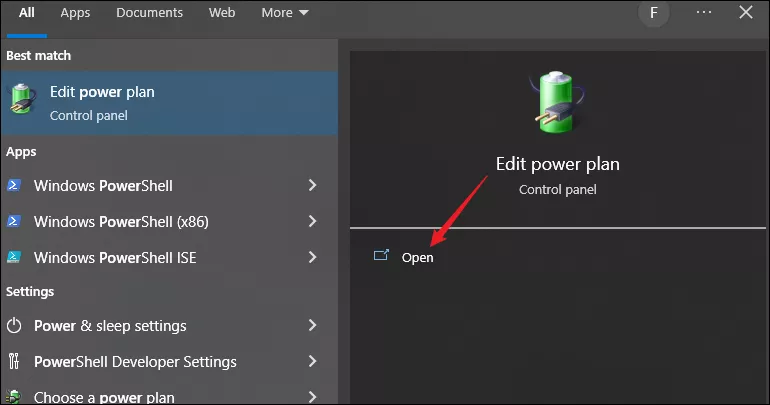
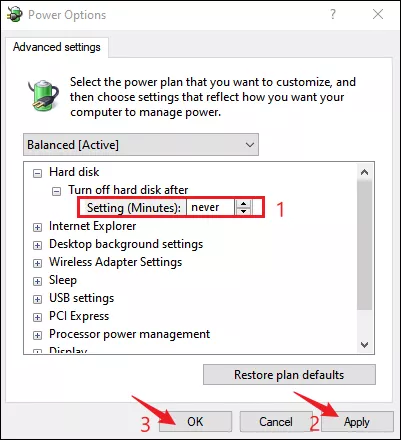
Step 1: Type edit power plan in the search bar and open it.
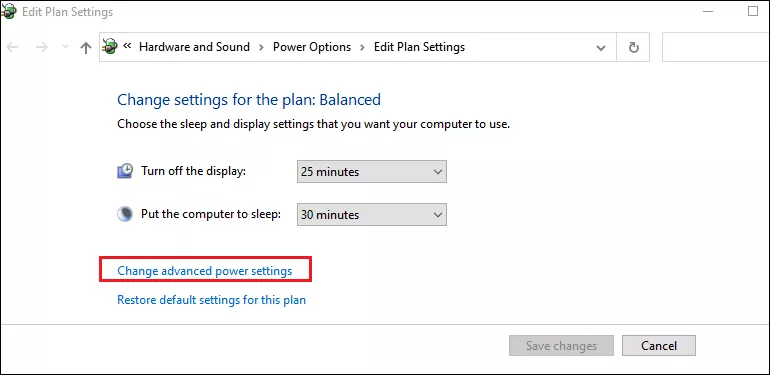
Step 2: Click on Change advanced power settings in the opened window.
Step 3: Under the Hard disk section, enter never in the Setting (Minutes) box.
Step 4: Click Apply and then OK to save the change. Then restart your PC.
4. Update USB controllers
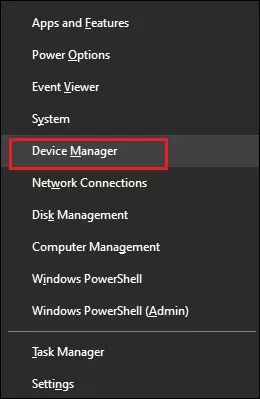
Step 1: Press Windows+X and select Device Manager from the context menu.
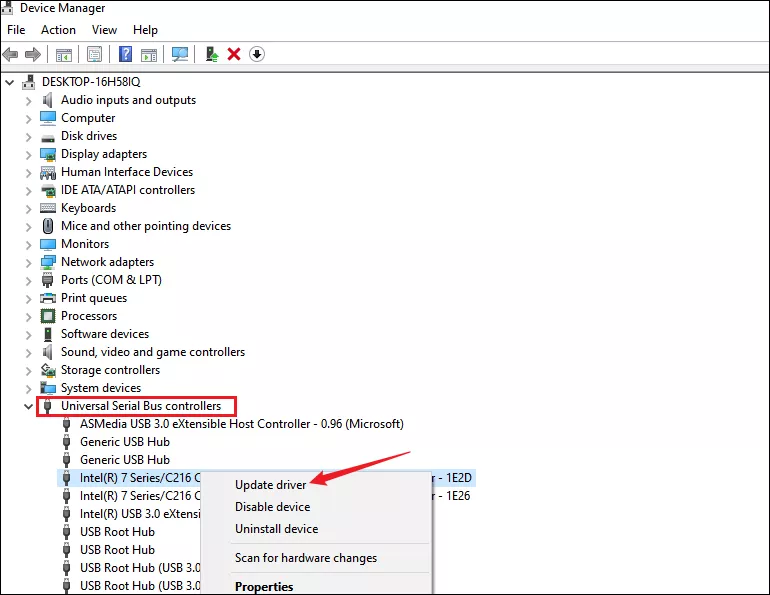
Step 2: Expand Universal Serial Bus controllers, right-click on the USB device and select Update driver.
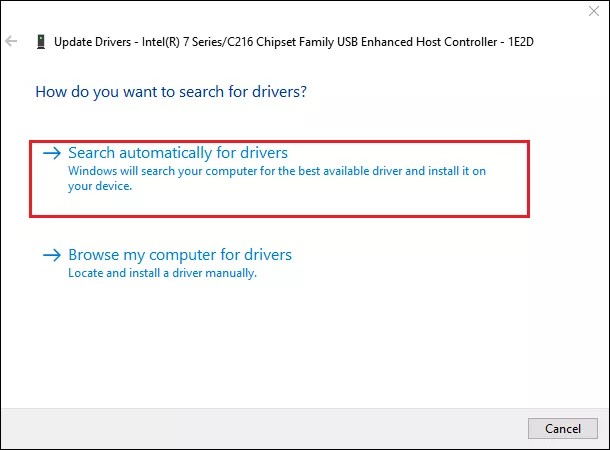
Step 3: Then select Search automatically for drivers.
Step 4: Reboot your device after finishing updating.
5. Run System Maintenance troubleshooter
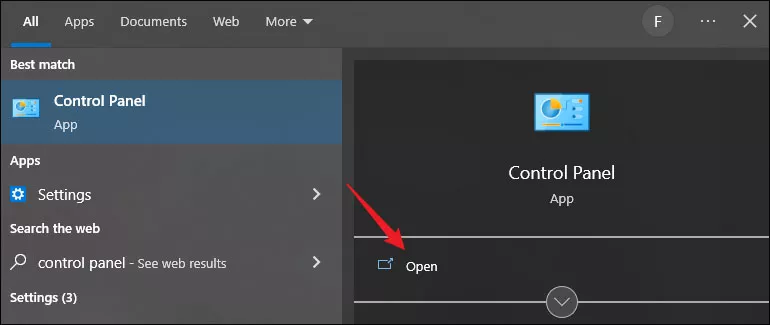
Step 1: Search control panel in the search bar and open it.
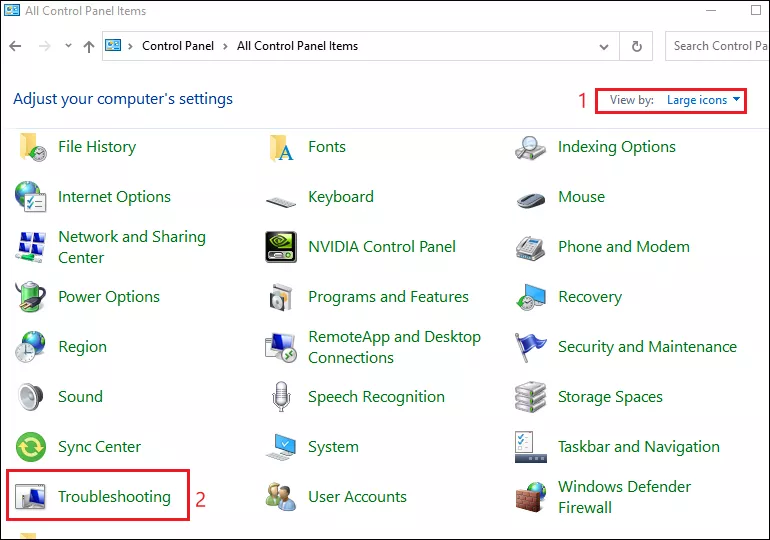
Step 2: Select view by Large icons and then choose Troubleshooting.
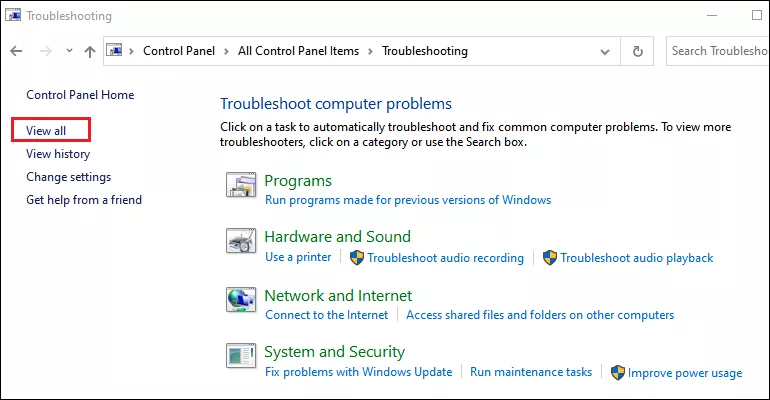
Step 3: Click View all on the left side.
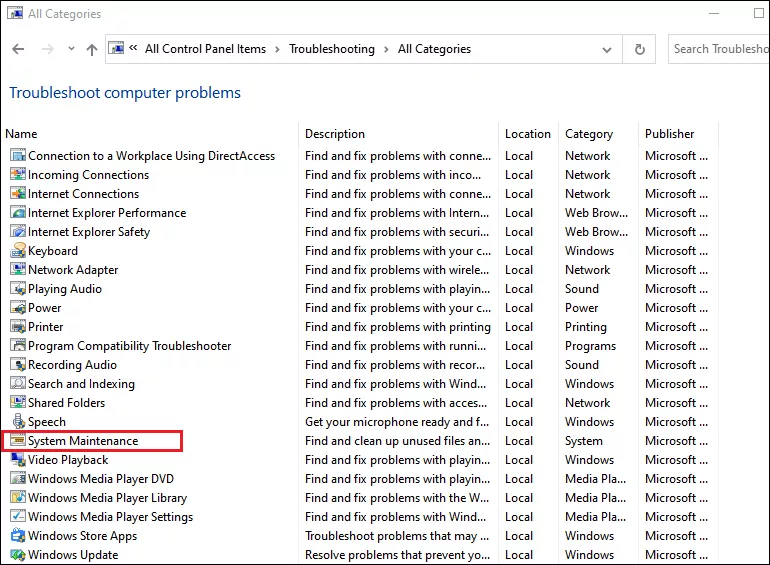
Step 4: Locate System Maintenance and click on it. Then it will run a troubleshooter automatically.
Step 5: Restart your system after the process finishes.


