What to Do If Your Microphone is Not Working on Windows 10 & 11?
Microphone has become one of the essential devices in our daily equipment. However, many users reported that the internal microphone did not work when their laptops were recently moved to Windows 10/11 OS, and they did not know how to do a microphone test to fix the problem. In this post, I will discuss the causes of microphone not working issue and various solutions which can help you fix the microphone not working on windows 10 & 11 error.
- Part 1: The causes of microphone not working
- Part 2: How to fix Microphone not working on windows 10 & 11?
- Solution 1: Check connection
- Solution 2: Ensure that the apps have access to the microphone
- Solution 3: Run Speech Troubleshooting
- Solution 4: Update audio drivers
- Solution 5: Set the microphone as the default device
- Solution 6: Update Windows to the latest version.
Part 1: The causes of microphone not working
- The cable connecting the microphone to the computer is disconnected.
- Something is stopping the sound from coming out of the microphone. If you are using a laptop, there may be something blocking the fan vents, which can prevent sound from coming out of the microphone.
- System incompatibility. Different users do not check the compatibility of the device with their system when connecting it to their system. This can sometimes lead to errors where the microphone does not work.
Part 2: How to fix Microphone not working on windows 10 & 11?
Solution 1: Check connection
Sometimes a device can be faulty, or the cable connecting the device and the system can break. Therefore, make sure the connections are correct and that the system and devices are in good condition.
Solution 2: Ensure that the apps have access to the microphone
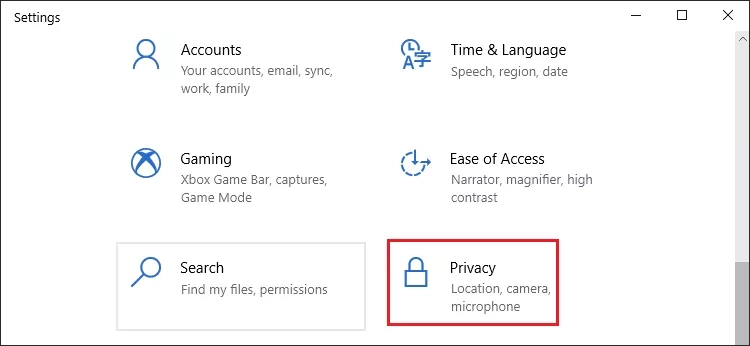
Step 1: Press Windows + I at the same time to open Windows Settings, find the "Privacy" option and turn it on.
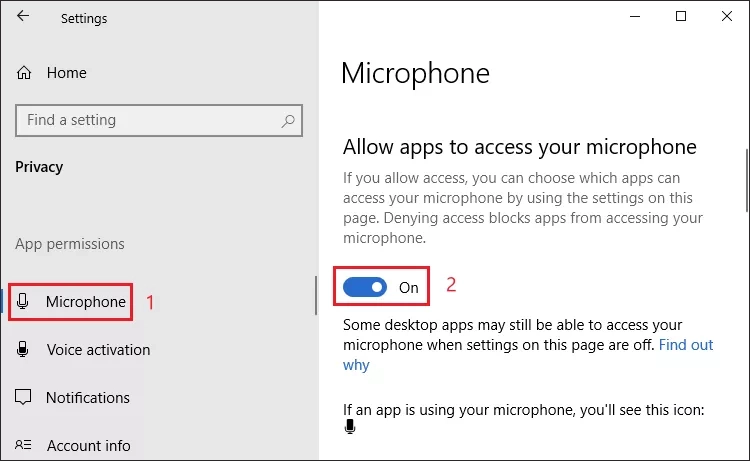
Step 2: In the left panel, click on the "Microphone" option and in the right panel, select to turn on the microphone. This action will allow the apps to access your microphone.
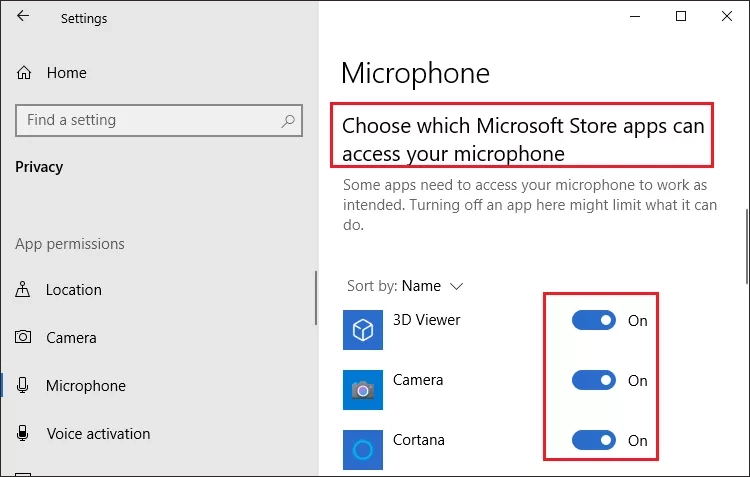
Step 3: Scroll down to choose which Microsoft Store apps can access your microphone and make sure all the apps you need can access the microphone.
Solution 3: Run Speech Troubleshooting
Step 1: Press Windows + I at the same time to open Windows Settings, find and click the "Update & Security" option.
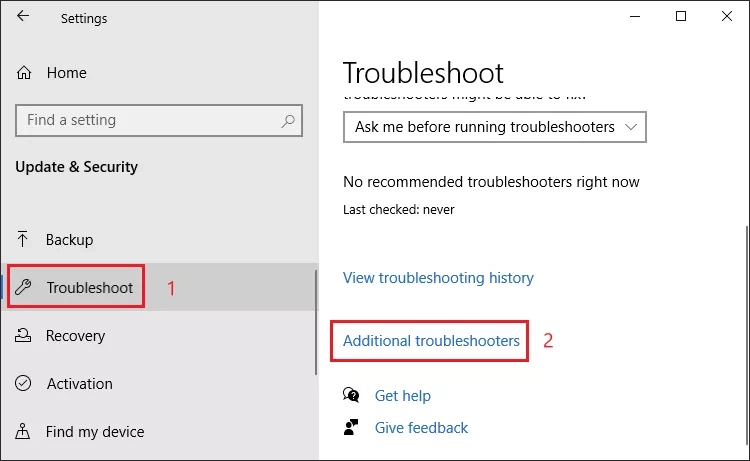
Step 2: Click "Troubleshoot" in the left window, slide to the bottom in the right window and select "Additional troubleshooters".
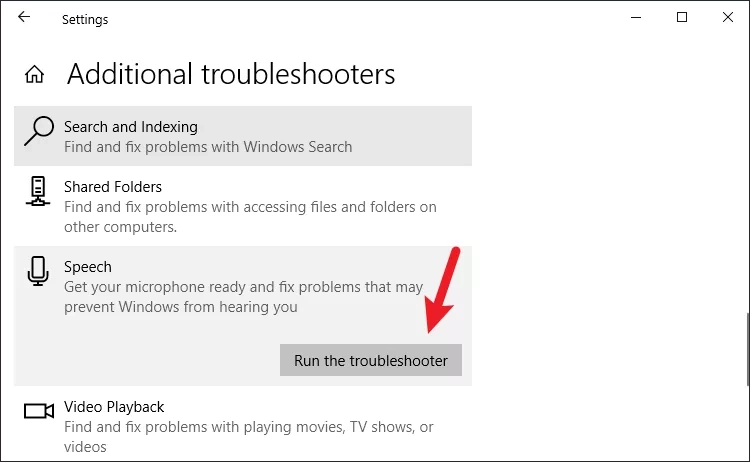
Step 3: In Additional troubleshooters, find the "Speech" option and click "Run the troubleshooter". The troubleshooter will start looking for errors and when it finds one, it will suggest a fix for it.
Solution 4: Update audio drivers
Step 1: In the search box on the taskbar, type "Device Manager", and then click to open it.
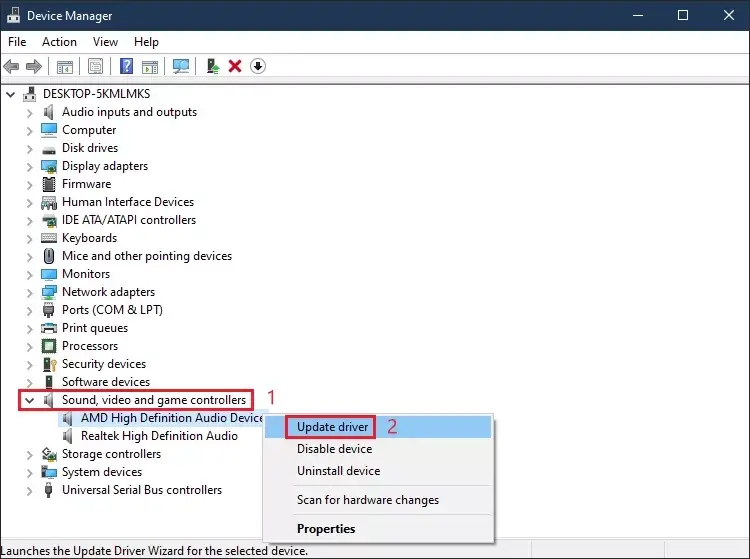
Step 2: Select the arrow next to "Sound, video, and game controllers" to expand it. Right-click on the list of sound cards or audio devices (such as headphones or speakers), click "Update Drivers".
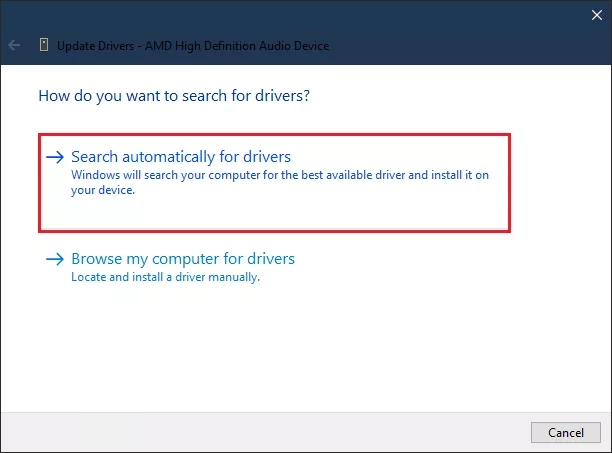
Step 3: Select "Search automatically for drivers". Follow the instructions to complete the update.
Solution 5: Set the microphone as the default device
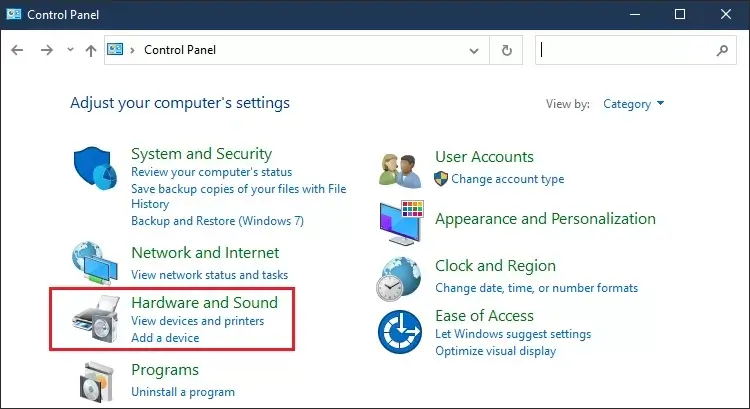
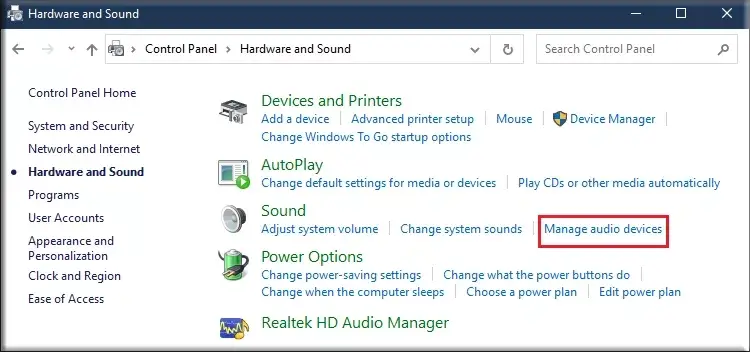
Step 1: Typing "Control Panel" in the search bar and selecting to open it. Then find and click on "Hardware and Sound".
Step 2: In the "Sound" tab, click on "Manage audio devices".
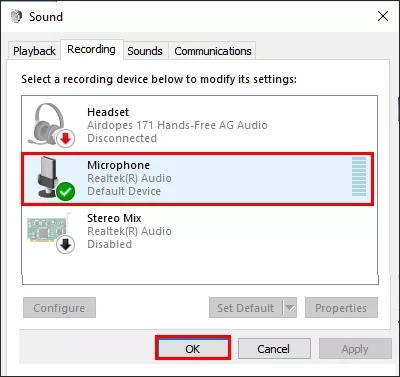
Step 3: In the pop-up dialog box, move to the "Recording" option, set your Microphone as the default device, and click "OK" to complete the change.
Solution 6: Update Windows to the latest version
Step 1: Use the shortcut Windows + I to open windows settings, find and click on "Update & Security".
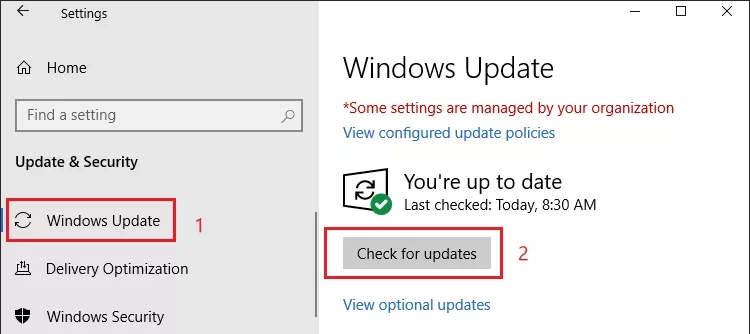
Step 2: Click on "Windows Update" in the left window and "Check for updates" in the right window. Make sure your Windows is updated to the latest version.
